REVIEW · REYKJAVIK
Reykjavík: Sólheimajökull Glacier Hike & Ice Climbing Intro
Book on GetYourGuide →Operated by Arctic Adventures · Bookable on GetYourGuide
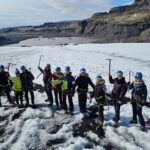
Sólheimajökull turns a walk into a mission. You’re on an Icelandic glacier where the ice is blue, the ground has ridges and cracks, and the guides help you explore it safely. The best part is the hands-on glacier time, not just looking at it from a bus window.
I also love the small group size (up to 8), because it keeps the pace calm and the coaching more personal. And the gear setup is first-rate, with crampons and everything you need so you can focus on the ice instead of logistics.
One consideration: this is physically demanding, and you’ll feel it later. Cold, wet weather and required ankle-support boots mean you can’t wing it with fashion shoes.
In This Review
- Key points before you go
- Sólheimajökull: The Glacier Where Blue Ice Looks Loud
- Reykjavík Pickup or Straight to the Glacier: Pick Your Comfort Level
- From Reykjavík: a full-day South Coast day
- Meet on location: half-day flexibility
- How the Gear and Safety Briefing Change Everything
- The Glacier Hike: More Than a Scenic Walk
- Ice Climbing Intro: Learning to Trust the Ice Axe
- The Cold, the Timing, and Why You Might Be Sore
- Price and Value: Why $203 Can Make Sense
- Who Should Book This and Who Should Skip It
- A Typical Flow of Your Day (So You Know What Fits Your Energy)
- Should You Book This Glacier Hike and Ice Climbing Intro?
- FAQ
- FAQ
- What is the main difference between the Reykjavík full-day and the meet-on-location half-day?
- Is ice climbing included, or is it optional?
- What gear do I get?
- Do I need to bring boots?
- What should I wear and pack for the weather?
- What age and shoe sizes are allowed?
- Who is this not suitable for?
Key points before you go
- Up to 8 people means more attention and less waiting on the glacier
- Safety gear is provided: crampons, helmet, harness, ice axe, ropes
- Optional ice-climbing intro teaches real technique, no prior experience needed
- South Coast waterfall stops (on the Reykjavík option) add classic Iceland sightseeing
- Shoe size rules matter: crampons are only available for EU 35–50
- Expect sore legs and cold fingers even on days with good visibility
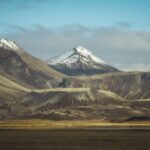
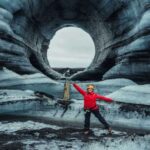
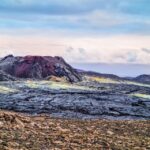
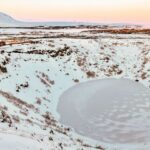
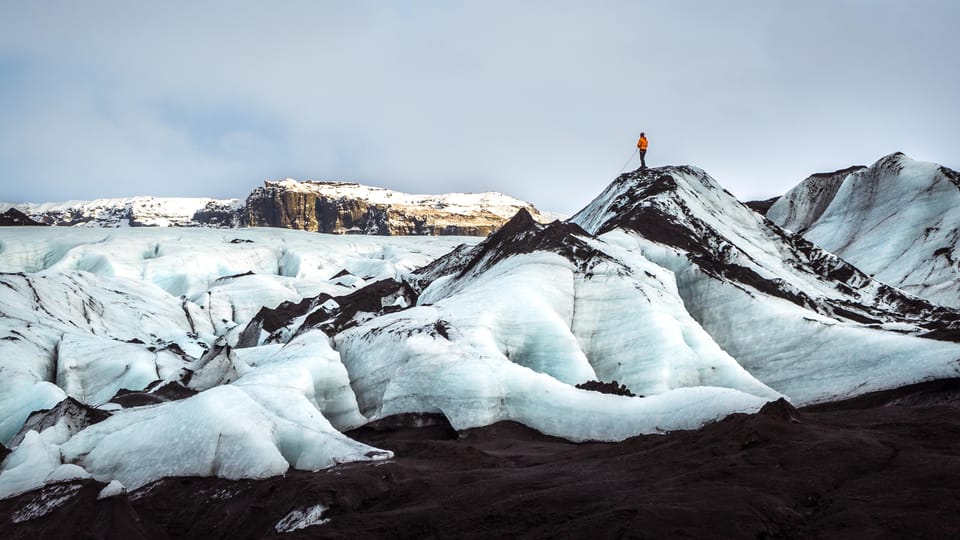
Sólheimajökull: The Glacier Where Blue Ice Looks Loud
Sólheimajökull is one of those rare places where the scenery does not feel staged. The ice has texture you can read with your eyes: crevasses, jagged edges, and natural routes that look solid until you’re up close. The glacier hike is your training ground for everything that comes later.
What makes this experience feel special is that you’re not just walking on a frozen surface. You’re learning how to move on uneven, ever-changing terrain while staying connected to your guide’s safety system. And when you try the climbing, you’ll understand why glaciers are more than postcards.
You can also read our reviews of more hiking tours in Reykjavik

Reykjavík Pickup or Straight to the Glacier: Pick Your Comfort Level
This experience comes in two main styles, and choosing the right one affects the whole day.
From Reykjavík: a full-day South Coast day
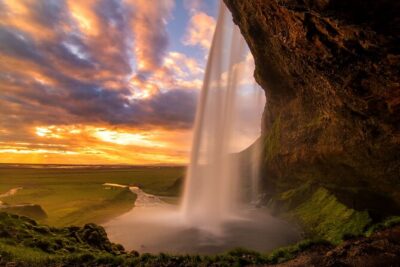
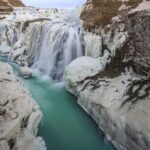
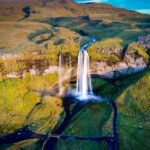
If you’re starting in Reykjavík, you’ll ride by coach and add two famous waterfall stops along the way: Seljalandsfoss and Skógafoss. Seljalandsfoss includes a photo stop plus a short guided tour and a walk (about 25 minutes). Skógafoss is another photo stop and sightseeing time with a visit and guided tour, plus walking and scenic views (about 30 minutes).
Value angle: those stops help fill the travel time, so you’re not just getting “transport to the ice.” It’s also a nice way to break up the long drive with classic Iceland views.
Possible drawback: a full-day schedule means you’ll get less control over timing. If you get motion-sensitive or you’re traveling with a tight itinerary, the half-day may feel better.
Meet on location: half-day flexibility
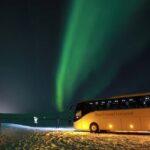
If you’re self-driving and you already know you want maximum glacier time, you can meet the group at the Sólheimajökull parking lot. You’ll meet the yellow Arctic Adventures bus there, and your group heads into the ice adventure from the base.
Value angle: you keep your morning or afternoon less structured, and you’re closer to the main event from minute one.
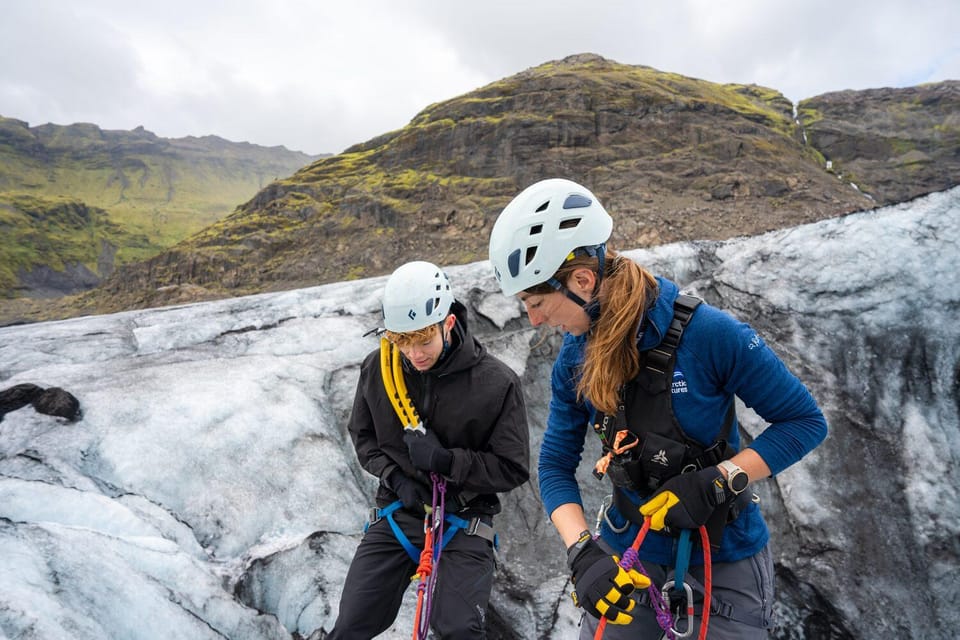
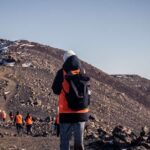
How the Gear and Safety Briefing Change Everything
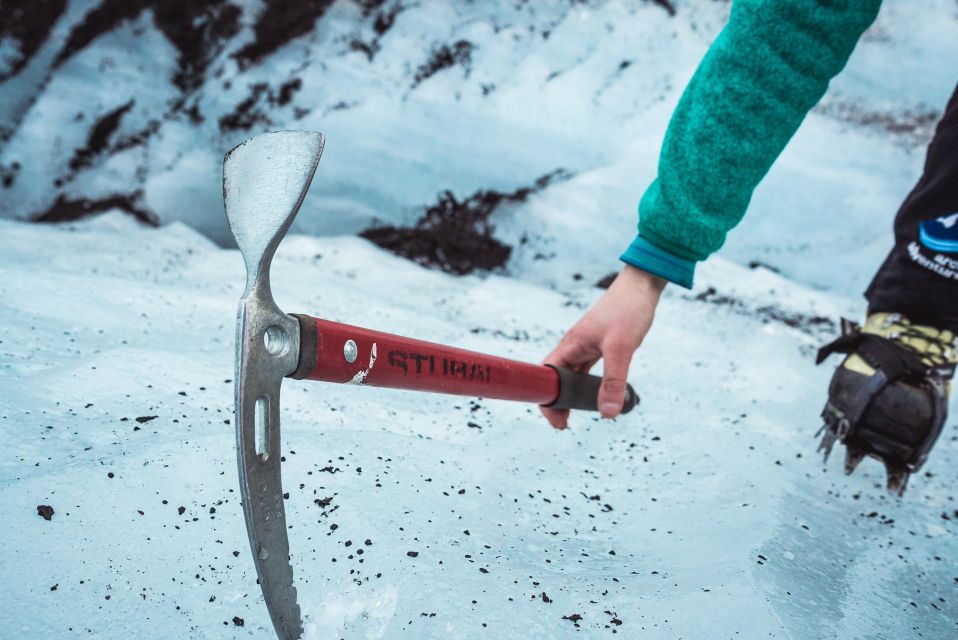
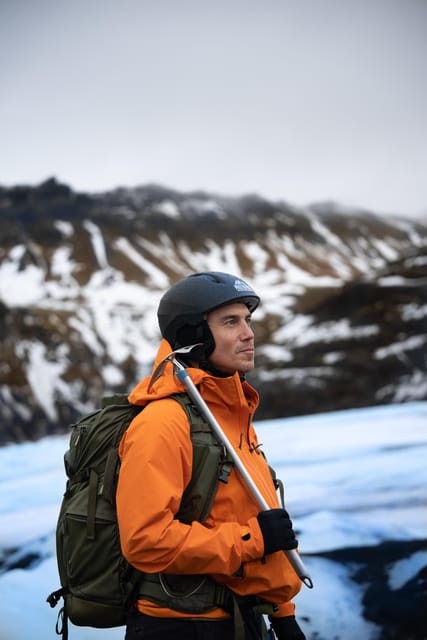
Glacier activities live or die on safety. Here, the setup is straightforward: you’ll get fitted with glacier crampons, a helmet, a harness, and an ice axe, with ropes involved as part of the safety system. That matters because the glacier isn’t just slippery—it’s unpredictable.
Before you step out, your certified glacier guide gives a thorough safety briefing. This is where you learn the “why” behind the rules: how you move, how you stay spaced, and what to do if something feels off.
From the guide style shown in the experience reports, the best instruction isn’t just technical. It’s also calm. Names you may meet include Monica, Daniel, Pavel (sometimes spelled Pavo in confirmations), Steve, and Francesco, and multiple guides are described as patient when people feel anxious or new to climbing.
If you’re a first-timer, that coaching tone is a huge part of the value. It helps you relax into the basics instead of freezing up on the ice.

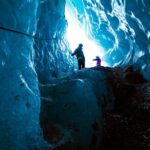
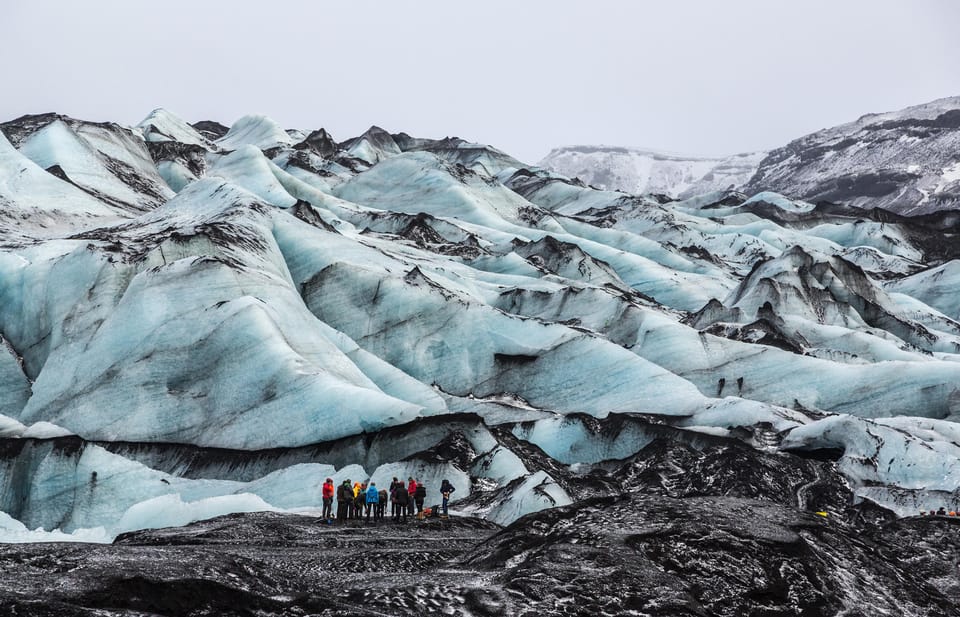
The Glacier Hike: More Than a Scenic Walk
Once you’re geared up, you hike onto Sólheimajökull and start exploring the real glacier world. You’ll spend time navigating routes safely with your guide showing how to handle the terrain.
What to expect on the ground:
- You’ll walk over ice that feels different under your crampons than rock or snow.
- You’ll see ice formations up close and move through areas that include ridgy edges and crevasse-rich terrain.
- You’ll get short “pause and look” moments for photos and for understanding what you’re looking at.
The schedule usually includes a safety briefing on arrival, then a longer stretch of guided hiking. You’ll also get a short photo stop and walk portion later, so you’re not only focused on moving—you can actually take in the glacier’s color and structure.
One realistic note: even when the hike is guided well, glacier walking is still effort. Your legs and core work more than you expect, especially in cold wind or wet conditions.
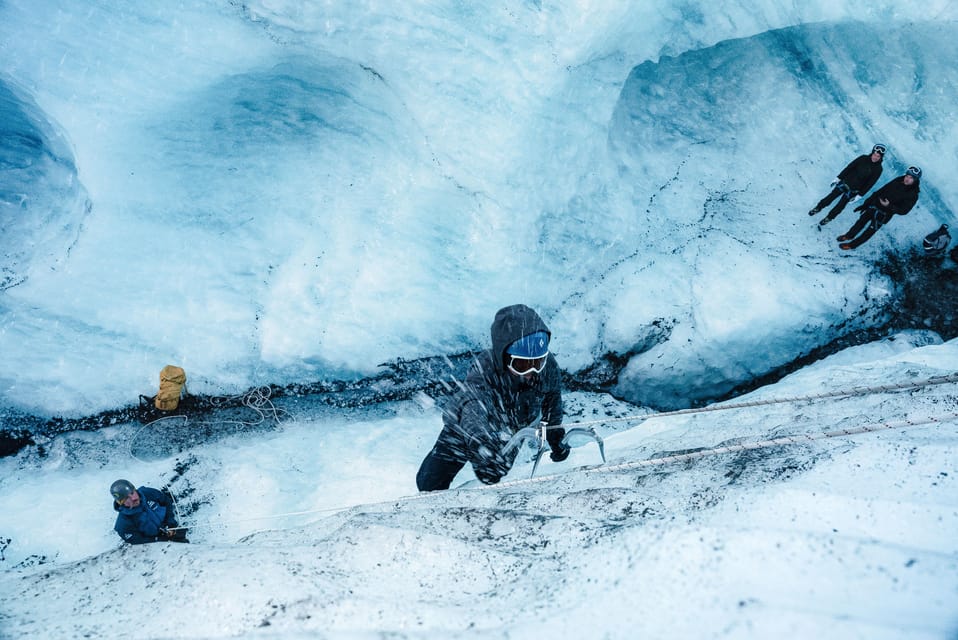
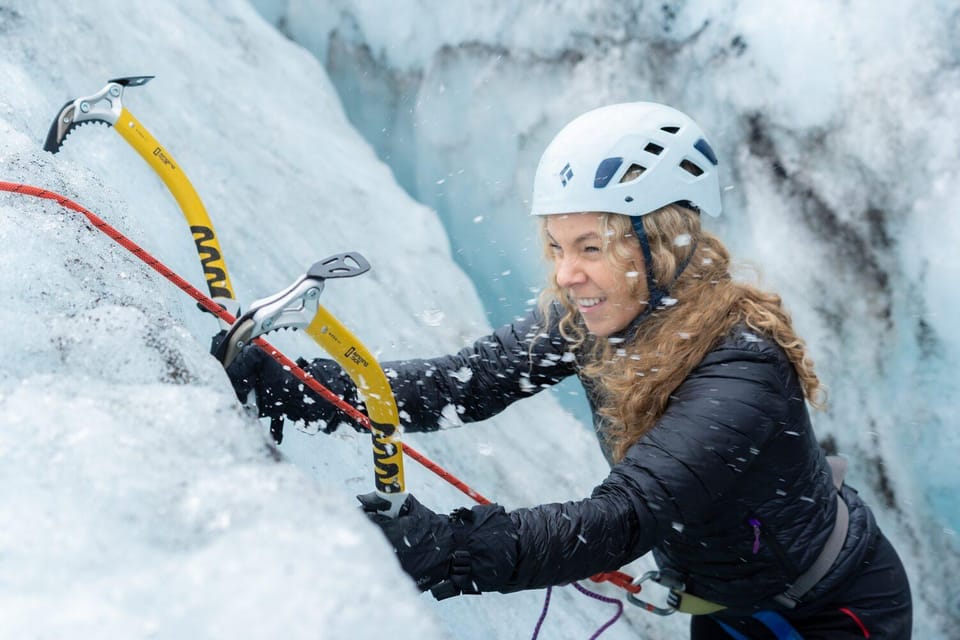
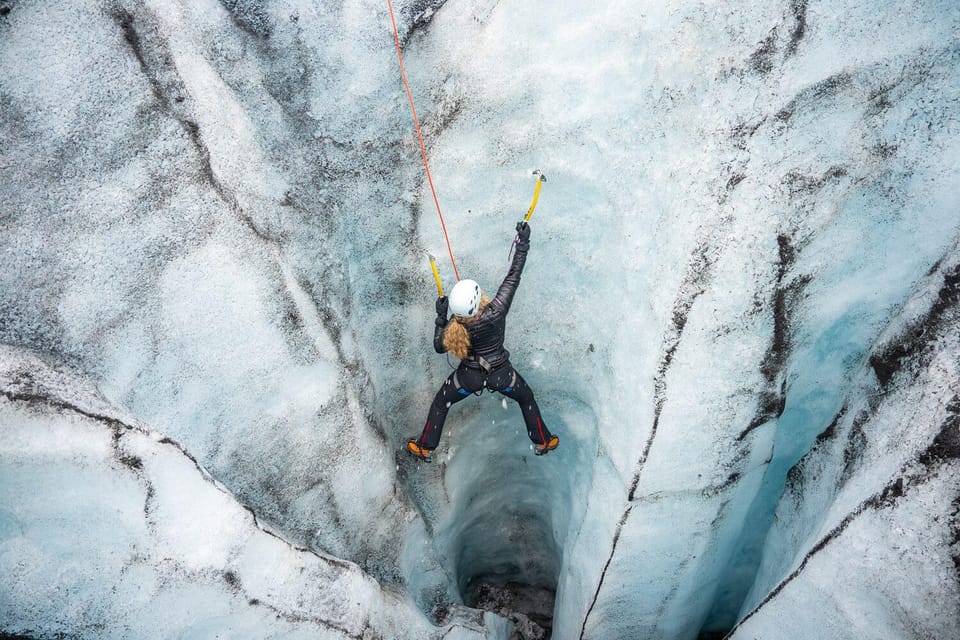
Ice Climbing Intro: Learning to Trust the Ice Axe
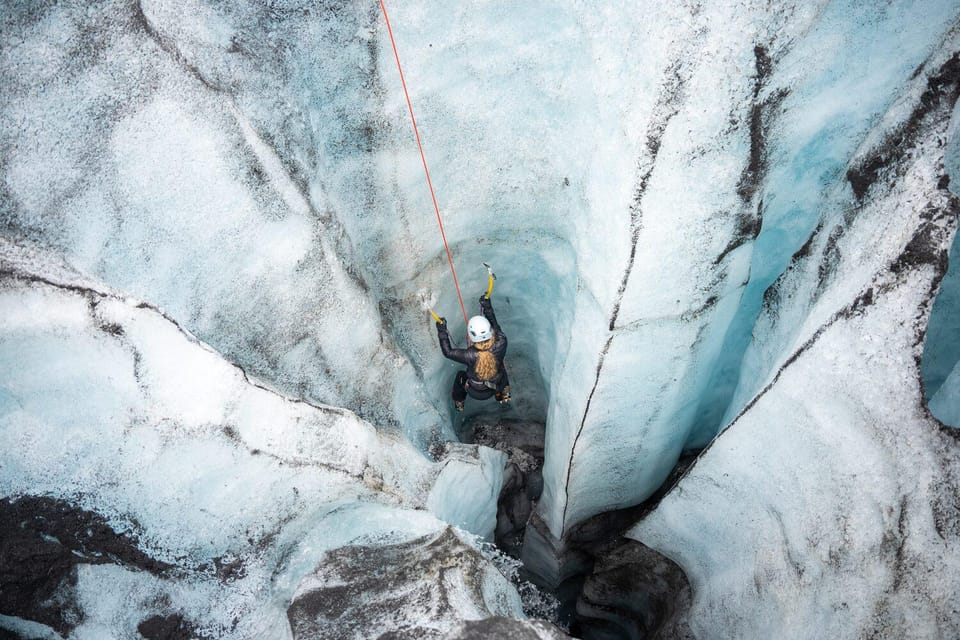
The optional ice-climbing part is where this tour shifts from hiking to a true adventure. You’ll be taught how to use your ice axe and technique to climb a natural ice wall.
This is designed as an intro, and you don’t need prior experience. That said, you should treat it like learning a new skill under cold pressure. Your guide’s job is to keep the technical side clear and keep you confident as you practice.
A pattern that shows up in the experience reports: guides often offer multiple tries and work with different ability levels. People describe being encouraged to climb while still feeling well-managed on safety steps.
If you feel nervous, don’t assume you’re the problem. Several accounts highlight guides who stayed calm and patient, especially for first-timers dealing with the cold or fear of heights. That’s a big reason this experience earns such high marks.
The Cold, the Timing, and Why You Might Be Sore
Timing depends on which option you choose. The tour duration ranges from 4.5 hours to 11 hours, which is a wide spread because the Reykjavík option adds the waterfall sightseeing and the longer round-trip drive.
On the glacier itself, you should plan for sustained effort in cold conditions. Even if the sun is out, the air can bite. Your hands and feet may feel it first, especially if you don’t have good insulation.
Bring the right clothing:
- Warm and waterproof jacket and pants
- Headwear and gloves
- Sturdy hiking shoes with ankle support (not optional)
If you’re thinking you’ll just wear trail sneakers, pause. This is the kind of activity where “good enough” often becomes miserable. Also, your body may ache for days afterward—people report leg soreness after an intense day on the ice.
Practical tip: pack snacks and take a hydration moment when you can. On cold, physical days, energy dips happen faster than you’d expect.
Price and Value: Why $203 Can Make Sense

At about $203 per person, this isn’t a cheap day, but it’s not just paying for a view either. You’re paying for several costly inputs:
- A certified glacier guide
- Professional equipment (crampons, helmet, harness, ice axe, ropes)
- Guided glacier hiking time
- Optional ice-climbing intro instruction
- Plus round-trip transportation and waterfall sightseeing if you choose the Reykjavík option
Value angle: for many visitors, the biggest expense isn’t only the tour price—it’s the risk of doing the wrong activity solo. Here you’re wrapped into the right skill set, the right equipment, and a safety-managed environment.
What could affect your personal value:
- You may need to rent sturdy boots for an extra fee if you don’t arrive with proper ankle-support footwear.
- Your shoe size has rules. Crampons only fit EU 35–50, so if your shoe size is outside that range, you won’t be able to participate.
Who Should Book This and Who Should Skip It
This tour is best for people who want an adventure and don’t mind working a bit. It’s also a good fit for first-timers—multiple reports describe people gaining confidence quickly and feeling safe because the guide keeps instruction clear.
It’s not a match if:
- You’re under 14 years old
- You are pregnant
- You have mobility impairments
- Your shoe size falls outside the crampon range (EU 35–50)
- You’re relying on shoes that aren’t ankle-support hikers (high heels and open-toed shoes are not allowed)
The good news: you don’t need to be an athlete. People report being older and not in perfect shape while still managing the activity because the guide sets a workable pace and breaks down technique.
A Typical Flow of Your Day (So You Know What Fits Your Energy)
Here’s how the day tends to move, regardless of option:
1) You start at the Reykjavík pickup points or at the Sólheimajökull parking lot (yellow Arctic Adventures bus).
2) On the Reykjavík option, you ride toward the south coast with a large chunk of coach time and two waterfall breaks.
3) At the glacier base, you get geared up with crampons and protective gear.
4) Your guide runs a safety briefing, then you hike in and explore crevasses and ice formations.
5) Later, you take on the ice-climbing intro, using your axe technique on a natural wall.
6) You finish with time for photos and then head back by coach.
So the day is a mix of driving, guided instruction, movement on uneven ice, and practical learning. If you like structure with skilled leadership, it works well. If you hate cold exposure and walking through wind, it may feel like too much.
Should You Book This Glacier Hike and Ice Climbing Intro?
If you want one Iceland day that turns scenery into skill-building, book it. The combination of guided glacier hiking plus ice-climbing instruction is the standout. You’re not left to guess what crampons do or how to move on an ice wall. You get the equipment, you get the briefing, and you get coaching.
I’d especially recommend it if:
- You want the classic south coast waterfalls plus glacier time
- You’re curious about climbing but have no experience
- You like small groups and direct attention from guides
I’d think twice if:
- You don’t have proper ankle-support footwear or you hate cold, wet outdoor days
- Your shoe size doesn’t fall into the crampon range
- You’re in a situation where the activity’s mobility demands won’t work
FAQ
FAQ
What is the main difference between the Reykjavík full-day and the meet-on-location half-day?
The Reykjavík option includes round-trip transportation and sightseeing stops at Seljalandsfoss and Skógafoss on the way to the glacier. The meet-on-location option has you go directly to the Sólheimajökull parking lot and join the tour there.
Is ice climbing included, or is it optional?
Ice climbing is an intro that’s optional. The experience includes a guided glacier hike, and the ice-climbing portion can be added as an introduction.
What gear do I get?
You’ll receive essential professional equipment for the glacier, including glacier crampons, a helmet, a harness, an ice axe, and ropes.
Do I need to bring boots?
Yes. Hiking boots with ankle support are mandatory. Sturdy boots can be rented for a small fee if you don’t have the right footwear.
What should I wear and pack for the weather?
Bring a warm and waterproof jacket and pants, plus headwear and gloves. Make sure you wear proper hiking shoes, and avoid high-heeled shoes and open-toed shoes.
What age and shoe sizes are allowed?
Minimum age is 14 years. You also need a minimum shoe size of 35 EU, and glacier crampons are available only for EU shoe sizes 35–50.
Who is this not suitable for?
It’s not suitable for children under 14, pregnant women, or people with mobility impairments, based on the tour’s requirements.