REVIEW · REYKJAVIK
Sólheimajökull Glacier Hiking Tour
Book on GetYourGuide →Operated by north ice · Bookable on GetYourGuide
Sólheimajökull is the kind of glacier you can actually reach fast. This easy, small-group hike lets you get onto the ice, learn how to walk with crampons, and hear the story of how Iceland’s nearby volcanos shape what you see. I especially liked the way the guide turns a short day trip into a real glacier experience, not just a photo stop.
My other favorite part was the focus on technique: you get hands-on instruction with the harness and ice tools, so you know what you’re doing before you walk. One consideration: you’re outside on ice, and Iceland weather can be rough—plan for cold, wind, and rain, and bring the personal gear the tour does not supply.
In This Review
- Quick hits on Sólheimajökull Glacier Hiking
- Why a Sólheimajökull Glacier Hike Fits a Reykjavík Day
- The Meeting Point: Where the Day Really Starts
- From Gravel to Ice: What You’ll Do Once You’re at the Glacier
- Crampons, Harness, and Ice Axe: How the Tour Makes It Feel Easy
- The Volcano Story You Can Actually See: Black-and-White Ice
- South Coast Waterfalls on the Route: Skógarfoss and Seljalandsfoss
- Gear and What You Must Bring (So You Don’t Freeze)
- Your Guide and the Small-Group Advantage
- Price and Value: Is $117 Fair for 3 Hours?
- Weather, Minimum Group Size, and Other Things to Plan For
- Should You Book This Sólheimajökull Glacier Hike?
- FAQ
- How long is the Sólheimajökull glacier hiking tour?
- Where does the tour start and end?
- Is this glacier hike difficult?
- What gear is included in the price?
- What should I bring that is not included?
- What group size should I expect?
- What language is the guide?
- Do I need to drive to the meeting point?
- What happens if the tour doesn’t meet the minimum number of participants?
- Is there any flexibility if my plans change?
Quick hits on Sólheimajökull Glacier Hiking
- Get kitted with real glacier gear: harness, crampons, and an ice axe are included
- Small group, big attention: limited to 10 participants, with an English live guide
- You’ll practice walking on crampons so the hike feels manageable
- Volcano ash creates striking ice contrast (black-and-white) on Sólheimajökull
- South-coast waterfall viewing on the route includes Skógarfoss and Seljalandsfoss
Why a Sólheimajökull Glacier Hike Fits a Reykjavík Day
Sólheimajökull is one of the closest glaciers to Reykjavík, and that matters. It’s about a 2 hours 20 minutes drive, which makes it realistic when you don’t want to spend your whole trip in a bus seat. This is also one of the most accessible glacier areas in Iceland, so you can experience a real glacier hike without needing advanced training.
The tour is built around a simple flow: you start on land, then you transition onto ice with step-by-step help. You end up with a feeling for how glaciers work—how people actually walk on them safely, what equipment does, and why this glacier looks the way it does.
And because you’re in the south region, you can tie your glacier time to classic south-coast scenery. That’s a big deal for value. You’re not just paying for a “walk on ice,” you’re also getting scenery that makes the drive worth it.
You can also read our reviews of more hiking tours in Reykjavik
The Meeting Point: Where the Day Really Starts
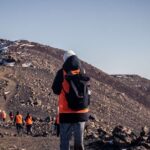
You’ll meet at a parking-lot area at a car with the North Ice logo. The activity ends back at the meeting point, so you’re not dealing with complicated drop-offs.
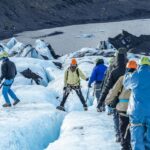
Before you head anywhere, the guide goes over the plan and confirms you’ve got what you need. Then you do a short 15-minute hike on a gravel road to the base of Sólheimajökull. This part is practical: it’s enough walking to get your body going, but it’s not the hard part. It also helps you shake out any nerves before the technical part starts.
If you’re driving yourself, plan carefully. Iceland roads can be rough, especially in winter, and you should make sure roads are open before you set out. I’d rather you arrive slightly early than rush and stress.
From Gravel to Ice: What You’ll Do Once You’re at the Glacier
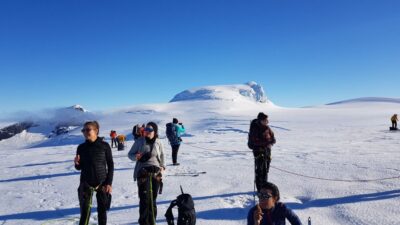
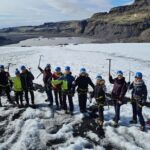
Once you reach the base, the guide shows you how to put on and use the glacier equipment. That’s where the tour earns its keep. Crampons and ice gear can feel intimidating if you’ve never used them, but you’re not thrown in cold.
Here’s the actual progression:
- You get gear fitted (including harness, crampons, and an ice axe)
- You learn walking technique under the boots so your steps feel controlled
- You start moving on the glacier with guidance close by
- You listen for explanations as you walk, not after you’re done
The tour runs about 3 hours total, and you should expect roughly 1.5 to 2 hours on the glacier. That timeline is a sweet spot. Long enough to feel you truly did something, short enough to keep fatigue and cold exposure under control.
The guide also points out features you’d miss on your own. You’re learning as you go, with plenty of stops for explanation and looking around.
Crampons, Harness, and Ice Axe: How the Tour Makes It Feel Easy
The big word people hear with glacier hikes is crampons, and that can sound intense. In practice, the tour is designed as an easy glacier hike for most people.
The key is instruction. You’ll be taught the techniques for walking with the metal spikes so your footing makes sense. Instead of guessing, you follow the guide’s lead and build confidence step by step. You’ll also learn about the gear you’re wearing—what it’s for and how to use it properly.
This is also why the glacier hike feels more approachable than you’d expect. When you understand how you should place your feet and how the equipment helps, the “fear factor” drops fast.
One small reality check: you still need to be ready for cold and surfaces that don’t behave like a trail. Even on an easy hike, you should keep your pace steady and listen when the guide adjusts spacing or route.
The Volcano Story You Can Actually See: Black-and-White Ice
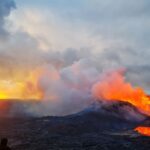
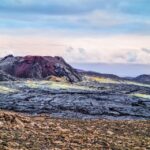
One of the most interesting parts is what happens because Sólheimajökull is surrounded by volcanos. The glacier doesn’t just look icy—it has visible layers and contrast created by volcanic ash.
As you walk, you can see ash deposits from different eruptions. That’s what creates the black-and-white effect people associate with Sólheimajökull. It’s not just a cool photo outcome. It also gives you a visual way to understand how Iceland’s geology keeps writing new chapters into the landscape.
The guide will explain volcanos, Sólheimajökull, and Iceland as you hike. The result is that you don’t leave with only one big memory (the ice). You also leave with a clearer picture of the forces that made and reshaped it.
South Coast Waterfalls on the Route: Skógarfoss and Seljalandsfoss
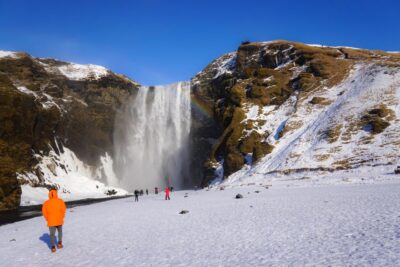
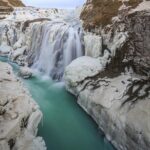
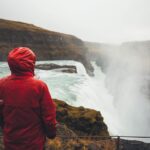
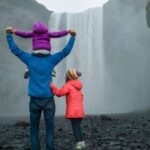
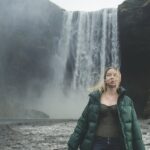
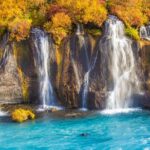
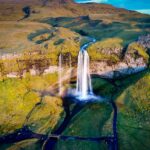
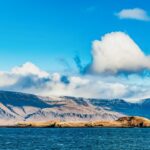
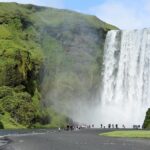
This day isn’t only ice. On the way, you’ll see the south coast waterfalls Skógarfoss and Seljalandsfoss. The tour doesn’t turn those into a huge sightseeing marathon, but they add big value to the overall trip.
Skógarfoss brings that classic Iceland feel: strong water, wide impact, and a dramatic look that’s easy to recognize even if you’re not a waterfall expert. Seljalandsfoss adds variety, with its distinctive vibe compared to more traditional falls.
Practical note: plan for wet conditions. Even if the glacier is the main event, the route includes places where spray and rain happen. Pack your rain gear and expect your day to be weather-driven.
Gear and What You Must Bring (So You Don’t Freeze)
The tour includes glacier gear: harness, crampons, and an ice axe. That’s a huge plus because glacier hiking gear can be expensive to rent or buy.
But you are responsible for key personal items. The tour does not include:
- Waterproof jacket or trousers
- Hiking boots
- Hat and gloves
So what should you bring? The tour guidance is straightforward:
- Hat
- Hiking shoes
- Gloves
- Rain gear
Here’s how I think about it: crampons handle traction on ice; they don’t handle warmth or waterproofing. If you show up in clothes that aren’t water-resistant, you’ll feel it fast once wind picks up. If you show up without gloves, your hands will be the first thing that reminds you you’re outside.
If you’re deciding between comfort and packing light, pick comfort. This is one of those tours where being prepared makes you enjoy the hike instead of battling your own discomfort.
Your Guide and the Small-Group Advantage
This is a small group tour, limited to 10 participants. That matters because glacier hiking is not a one-size-fits-all activity. You need space, and you need the guide to be able to check your footing and equipment.
In one case, the onsite guide was Bergur, and the group experience described was on time, light, and informative. That combination is ideal: you want safety and technique, but you also want the day to feel fun rather than like a serious training session.
A good guide also makes the glacier hike more meaningful. They point out what you’re looking at—volcano ash patterns, glacier context, and how the walking works—so your time on the ice feels purposeful.
Price and Value: Is $117 Fair for 3 Hours?
At $117 per person, you’re paying for more than a walk. You’re paying for:
- Professional guide time
- Included glacier gear (harness, crampons, ice axe)
- Time on an actual accessible glacier close to Reykjavík
- Instruction that reduces risk and helps you feel steady on crampons
If you’ve ever tried to cobble together glacier gear and instruction on your own, you’ll understand why this price can be a bargain. The gear alone can be a chunk of cost depending on what you need and how long you need it.
Also, the time structure matters. About 1.5 to 2 hours on the glacier within a 3-hour total tour is a strong ratio. You get real ice time without burning the whole day. Add the south-coast waterfall stops on the route, and the day feels like more than just glacier tickets.
So for most people—especially if this is your first glacier hike—this price feels reasonable. The main “cost” isn’t money; it’s preparation. You’ll need to bring the required personal clothing and be ready for weather.
Weather, Minimum Group Size, and Other Things to Plan For
Iceland weather is the variable you can’t control, only respect. Even in seasons that feel mild in Reykjavík, you can get wind and rain around the south coast and glacier areas. If you don’t pack rain gear, the day can shift from enjoyable to uncomfortable quickly.
One more practical detail: there’s a minimum number of participants (5). If the tour doesn’t reach that minimum, it won’t run. That means your plan should include a backup option for the day in case it gets canceled.
If you’re driving to the meeting point, keep an eye on road conditions and make sure roads are open. Iceland driving can get rough, especially in winter.
Should You Book This Sólheimajökull Glacier Hike?
Yes, if you want a glacier experience that stays approachable. This tour is built for most people because it includes gear fitting and walking instruction with crampons. You also get a strong “why it looks like this” lesson through the volcano and ash black-and-white contrast.
Book it if you also want value from a Reykjavík day trip. The drive is not short, but the combination of ice time plus south-coast stops like Skógarfoss and Seljalandsfoss makes the day feel full.
Skip it (or think twice) if you hate cold, can’t dress for rain, or aren’t willing to bring the required personal items like gloves and a waterproof layer. Glacier hiking punishes underprepared hands and legs.
If you’re the type who likes real nature moments with real guidance, this is a solid choice.
FAQ
How long is the Sólheimajökull glacier hiking tour?
The tour lasts about 3 hours. You can expect about 1.5 to 2 hours on the glacier.
Where does the tour start and end?
You start at the parking lot at a car with the North Ice logo. The tour ends back at the same meeting point.
Is this glacier hike difficult?
It’s described as an easy glacier hike suitable for most people, with instruction on how to walk using the crampons.
What gear is included in the price?
Glacier gear is included, including a harness, crampons, and an ice axe. A local guide is also included.
What should I bring that is not included?
You should bring waterproof rain gear, a hat, gloves, and hiking shoes. Waterproof jacket or trousers and hiking boots are not included.
What group size should I expect?
The group is small, limited to 10 participants.
What language is the guide?
The tour has a live English-speaking guide.
Do I need to drive to the meeting point?
You can drive or travel to the meeting point area, but if you’re driving, make sure roads are open and drive carefully since weather can be rough, especially in winter.
What happens if the tour doesn’t meet the minimum number of participants?
If the minimum number (5 participants) is not reached, the tour will not go ahead.
Is there any flexibility if my plans change?
You can cancel up to 24 hours in advance for a full refund, and you can reserve now and pay later.
If you want, tell me your travel month and whether you’re bringing your own waterproof layers and gloves—I can help you sanity-check what to pack for the weather you’re most likely to face.