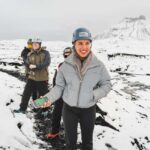
REVIEW · VIK
Vik: Guided Glacier Hike on Sólheimajökull
Book on GetYourGuide →Operated by David The Guide Iceland · Bookable on GetYourGuide
Walking on Sólheimajökull feels like another planet. This 3-hour guided glacier hike gives you the right gear, a clear safety briefing, and plenty of time to enjoy the ice formations up close.
I love how approachable it feels for a place that looks so wild, and I love how photo stops are built into the route without rushing you.
The best part is the sense of stepping into a living, changing ice world, not just walking on snow. I love learning what’s happening inside the glacier and watching the colors shift from white snow to darker ash streaks. One drawback to plan for: it’s not suitable for children under 8, pregnant women, or people with mobility impairments, and you’ll need proper hiking boots that fit crampons.
In This Review
- Key Highlights You’ll Care About
- Where You Meet Solheimajökull and What Gear Takes Care Of
- Crampons, Harness, and a Non-Technical Route That Still Feels Real
- The Hike Itself: Murky Lagoon Start to Big Ice Views
- Photo Ops That Feel Like Part of the Walk
- Glacier Water: Topping Up Your Bottle the Iceland Way
- What Your Guide Teaches About Ice (and the Safety Part That Matters)
- Price and Value: Is $120 for 3 Hours Fair?
- Weather, Clothing, and Footwear: The Stuff That Makes or Breaks It
- Who Should Book This Glacier Hike (and Who Should Skip It)
- Quick Verdict: Should You Book This Solheimajökull Hike?
- FAQ
- What’s included in the tour price?
- Do I need to bring hiking boots?
- How long is the hike on Sólheimajökull?
- Is the hike technical or climbing-focused?
- Where do I meet the guide?
- Can I drink glacier water?
- What’s the age and suitability limit?
Key Highlights You’ll Care About
- Non-technical glacier walking with safety gear and an expert guide leading the way
- Crampons, harness, helmet, and ice ax are provided, so you’re not guessing
- Meltwater refills: you can top up your bottle from freshwater streams while on the ice
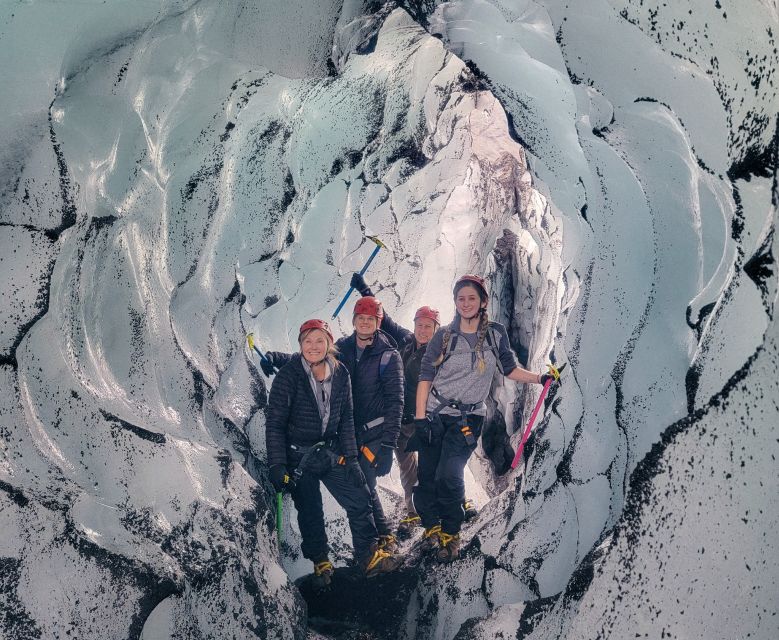
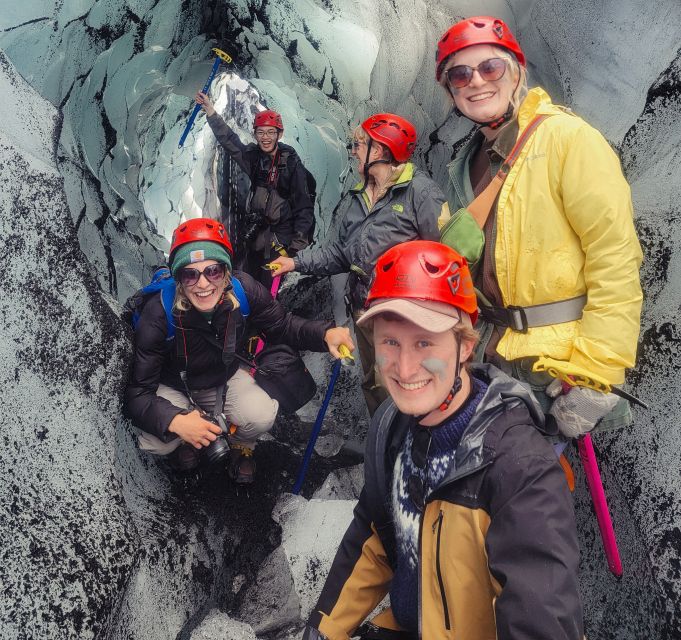
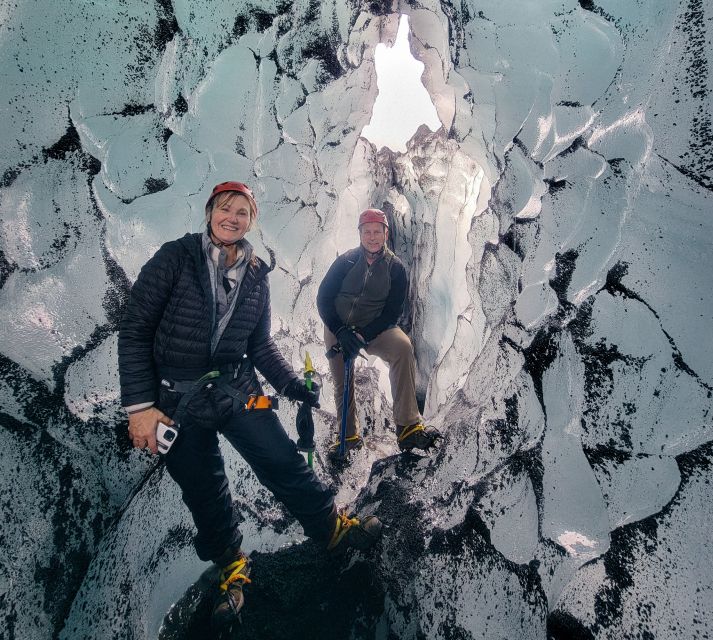
- Photo-friendly ice scenery, including towering ice walls, deep crevasses, and sometimes small ice caves
- Big-ice views from higher ground, with Westman Islands, South Coast black sands, and lava country on clear days
- Guide styles that keep you confident, with calm, patient instruction and time for questions
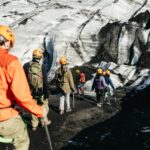
Where You Meet Solheimajökull and What Gear Takes Care Of
You’ll start at the Solheimajökull Glacier base camp near Vik, in the parking lot just off Ring Road (Highway 1). Your guide will have the David the Guide logo on their gear, which helps you spot them fast. Plan to arrive about 20 minutes early so you have time to get fitted and get your route briefing before anyone steps onto the ice.
Once you arrive, the tour becomes very practical. You’ll get dressed with what glacier walking actually requires: a harness, helmet, and crampons, plus an ice ax. If you’re bringing your own footwear, make sure it’s real hiking gear; athletic sneakers may not work with the crampons.
Snacks and drinks are not included, and you’ll need to handle your own food. That’s fine, because the “food you don’t think about” here is your layers and hydration, not a lunch break.
One small planning tip: the meeting spot seems straightforward, but some people found confusion in the past about exactly where to gather. So if you arrive and you’re not sure, don’t wait—confirm quickly with the guide or staff and get yourself in the right place before the briefing starts.
You can also read our reviews of more guided tours in Vik
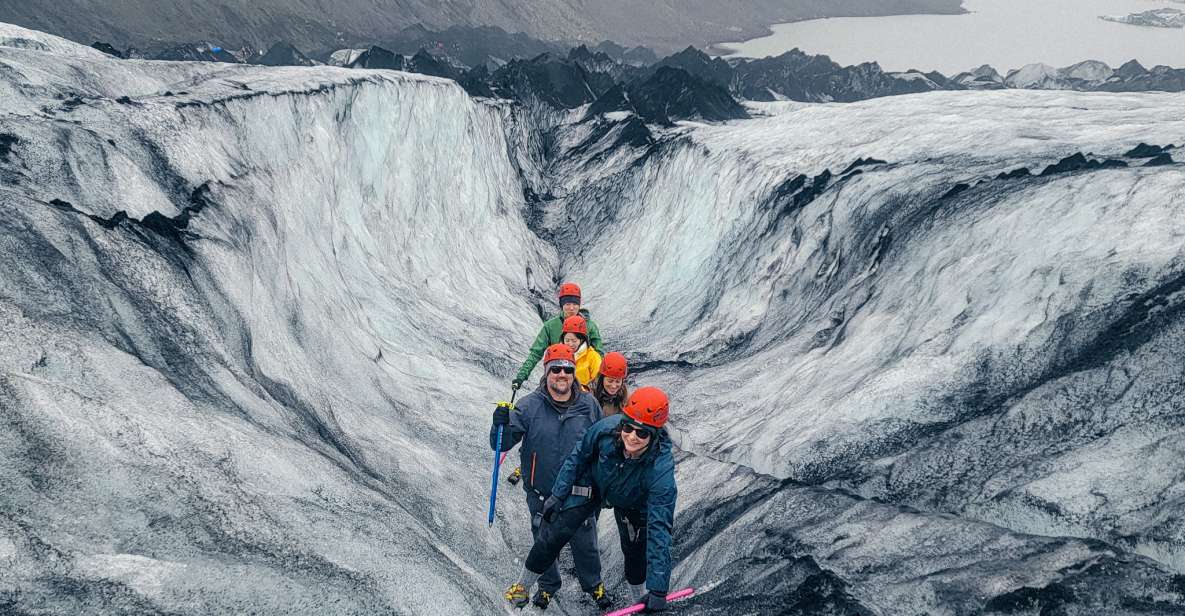
Crampons, Harness, and a Non-Technical Route That Still Feels Real
This is a non-technical glacier hike, which is a huge relief if you’re nervous about ropes, technical climbing, or “real mountaineering” vibes. That said, it’s still glacier walking, so you should treat it like an activity with real footing requirements.
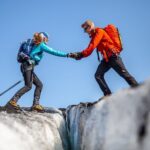
The guide’s first job is fitting you. Harness and helmet go on first, then crampons, then the ice ax. You’ll get instructions on how to move safely on the ice surface and how the route works before you head out. This is the moment where your comfort level jumps—because once you see how your guide expects you to step, you stop overthinking every foot placement.
Even when the terrain is described as accessible, you’re walking on an ice surface that can look flat until you’re actually out there. That’s why the crampons matter, and why hiking boots are required. If you don’t have boots that fit properly, you’ll need to contact the provider about rentals rather than trying to make it work with the wrong shoes.
What I like about this setup is that it’s confidence-building, not just rule-giving. Your guide can keep an eye on how you’re moving, adjust the pace, and get everyone lined up safely as you cross the glacier terrain.
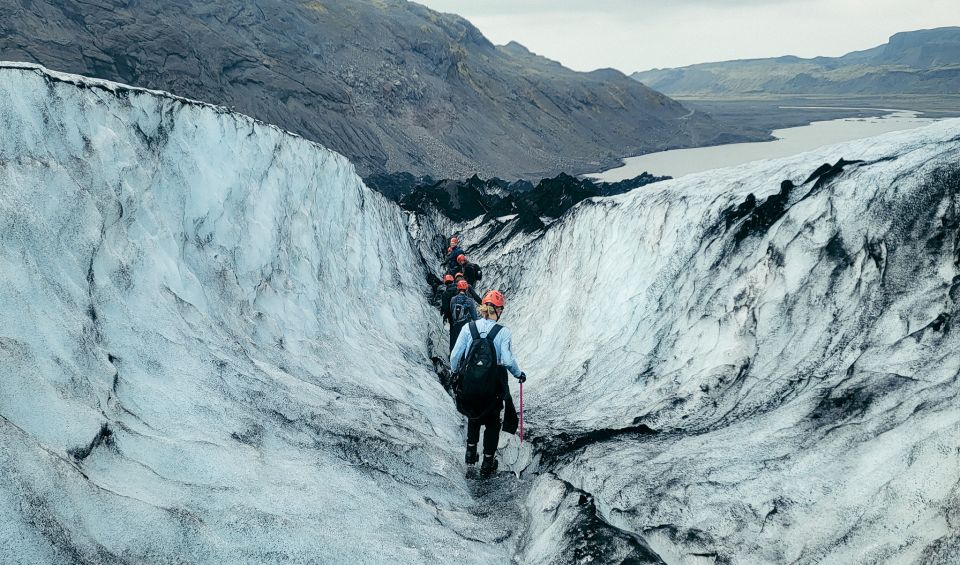
The Hike Itself: Murky Lagoon Start to Big Ice Views
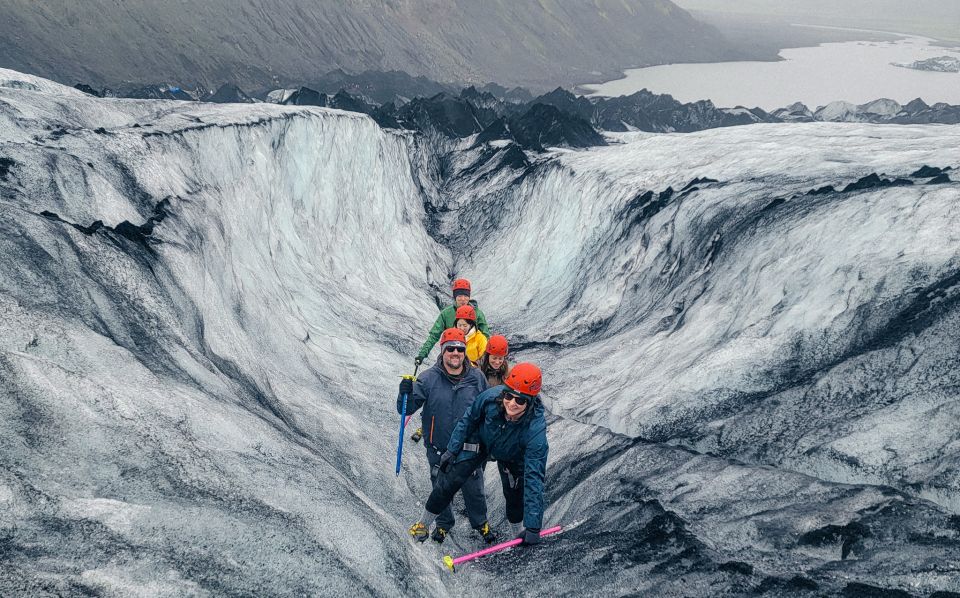
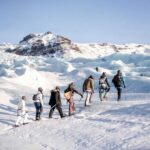
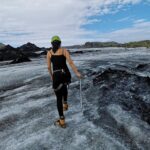
The walk begins with a short approach around the glacier base area, including a murky glacier lagoon near Solheimajökull. That early section matters because it sets expectations: the ice looks strange, smells like cold stone, and moves under your feet in a way you don’t get on normal trails.
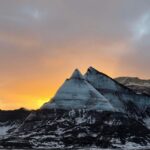
Then you step onto snowy glacier ground, where the scale hits you. Solheimajökull is an outlet glacier connected to Myrdalsjökull, one of Iceland’s larger ice caps. In plain terms: you’re hiking on a glacier that’s part of a much bigger system, which is why the formations can look so dramatic and why the colors can be so striking.
As you go higher, the views expand. On clear weather, you can look over toward dramatic mountains, the Westman Islands, and the black sands along Iceland’s South Coast. You also get the chance to see lava country—so it’s not just “ice tourism.” It’s a full sweep of Iceland’s different textures meeting in one spot.
The route also gives you the kind of ice detail that’s hard to appreciate from the parking area. You can expect things like:
- towering ice walls
- deep crevasses
- glistening icicles
- and sometimes winding ice caves, depending on the day’s conditions
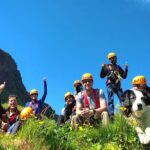
A note on pace: glacier hikes can feel slow when you’re standing still to take photos, and fast when you’re walking between formations. The good guides keep that balance. In the booking feedback for this tour, names like Susanna, Önundur, Elias, Norbert, Kamila, Agnieszka, and Jon show up with a similar theme: steady guidance, calm attention to safety, and time to stop for photos. You’re not being herded; you’re being guided.
Photo Ops That Feel Like Part of the Walk
You’ll get multiple moments that are clearly intended for photos, but the best part is how the guide chooses them. Instead of just stopping for a picture and moving on, the guide positions you so you can see the ice formations and understand what you’re looking at.
This tour has a strong “look longer” vibe. You’ll spend meaningful time on the glacier, walking among ice features you wouldn’t find on your own. And if the weather is cooperative, the views from higher ground make the whole hike feel like a reward.
Even if the glacier looks busy from the road, one of the practical joys here is that your guide can help you find a calmer rhythm on the ice. A few groups have noted that the experience felt quieter than expected, which makes photos and conversations easier.
Bring your phone or camera, but also bring the mindset that you’re not just capturing images. You’re learning the shape of this place—how the ice changes, how color happens, and why it looks the way it does.
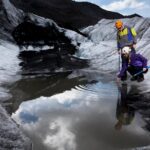
Glacier Water: Topping Up Your Bottle the Iceland Way
One of the highlights is the chance to drink glacier water. More realistically, you’ll be able to refill your bottle with pure freshwater from streams created by melting glacier ice.
This is one of those activities that sounds small until you’re doing it. Suddenly “water” stops being a generic thing in your bottle and becomes part of the glacier system you’re standing on. It’s cold, it tastes clean, and it’s a reminder that the glacier is actively changing right now.
Just keep it sensible: drink enough to stay comfortable, but don’t rely on it as a substitute for warm layers or waterproof clothing. Cold air and wind can make you feel dehydrated even if you’re not sweating.
You can also read our reviews of more hiking tours in Vik
What Your Guide Teaches About Ice (and the Safety Part That Matters)
A big reason this hike is worth doing with a guide is what you learn beyond the scenery. Your guide will explain how glaciers form and why Iceland is so known for them. They’ll also talk about the dangers glaciers face and how you can help protect them in the future.
That science talk isn’t just academic. It connects to safety in a real way. When you understand why ice behaves differently than rock or snow, you take your guide’s movement instructions more seriously. And because glacier terrain can change quickly, being guided by someone trained to handle different situations matters.
In the feedback, a strong pattern is that guides are patient and clear. People describe instructions that make you feel safe, plus a pace that lets you look around. If you’re slightly unsure at the start, this kind of coaching can make a big difference, especially when you’re learning how to walk with crampons without overcorrecting.
Price and Value: Is $120 for 3 Hours Fair?
At $120 per person for about 3 hours, this is not a cheap add-on. But glacier hikes are built around real overhead: safety gear, trained guides, and the logistics of getting you to and onto the ice correctly.
Here’s how I think about the value:
- You’re paying for equipment you can’t easily DIY, like crampons, harness, helmet, and the ice ax.
- You’re paying for safety planning and on-ice decision-making, not just someone walking beside you.
- You’re paying for time on the glacier with enough stops to take photos and see formations.
If you can only do one glacier activity in Iceland’s south, this one makes sense because it’s accessible (non-technical), guided, and built around the kind of visual ice detail you remember later. If you’re already comfortable doing DIY hikes, you’ll still likely feel that the guide is the difference between seeing ice from a distance and actually understanding it while you’re there.
Weather, Clothing, and Footwear: The Stuff That Makes or Breaks It
Glaciers don’t care about your plans for a perfect day. Even when weather is decent, conditions on the ice can turn cold quickly.
Here’s what you should plan for based on what’s been emphasized for this tour:
- You need hiking boots (not just sneakers).
- Dress warm and be ready for wet patches; rain in the area can happen.
- Waterproof layers help because you may get damp around wetter sections.
- If you’re able, consider bringing a change of clothes so you’re not finishing the day cold and uncomfortable.
You don’t need to overpack, but you do need to respect the environment. Bring layers you can add or remove, and think about how you’ll feel standing still for photos in wind.
Who Should Book This Glacier Hike (and Who Should Skip It)
This tour is designed for people who want a real glacier experience without technical climbing. It’s also a great match for first-timers who want their questions answered and their route safely managed.
You should be cautious about booking if you fall into any of the “not suitable” categories: children under 8, pregnant women, or anyone with mobility impairments. Also, if you don’t have boots that fit crampons, plan for a rental or ask the provider ahead of time.
If you’re the kind of traveler who likes a structured adventure—gear fitting, clear instruction, time to look and take photos—this fits well. And if you want Iceland beyond waterfalls and black-sand beaches, walking on ice near Vik is one of the most memorable “I was there” moments you can add to your day.
Quick Verdict: Should You Book This Solheimajökull Hike?
Book it if you want a guided glacier walk that feels approachable but legit—with crampons, harness, safety guidance, and serious ice scenery in just 3 hours. The value comes from the combination of gear + training + time on the ice, not from a long trip budget.
Skip or rethink it if you can’t wear suitable boots, need accessibility accommodations, or you fall into the tour’s stated limits. Also, if you’re the type who hates cold and wet conditions, bring serious layers because the glacier won’t turn into a warm hike just because it’s sunny near the parking lot.
If your day in Iceland’s south has room for one “only-in-Iceland” moment, Sólheimajökull is a strong choice.
FAQ
What’s included in the tour price?
The tour includes a private guide and the safety equipment you need for glacier hiking (like the gear used on the ice).
Do I need to bring hiking boots?
Yes. Hiking boots are required because they must fit the glacier crampons. If you don’t have boots, contact the provider about boot rental.
How long is the hike on Sólheimajökull?
It runs for about 3 hours.
Is the hike technical or climbing-focused?
It’s described as a non-technical glacier hike. You’ll still use proper glacier gear and follow your guide’s instructions.
Where do I meet the guide?
Meet in the Solheimajökull Glacier parking lot, just off Ring Road (Highway 1) near Vik. The guide will have the David the Guide logo on their gear.
Can I drink glacier water?
Yes. Part of the experience includes the chance to drink glacier water, and you can refill your bottle in freshwater melt streams while on the glacier.
What’s the age and suitability limit?
It’s not suitable for children under 8, and it’s also not suitable for pregnant women or people with mobility impairments.